
1-208-754-4884

How to Choose a Mini Mill Power Feed?

Choosing a Mini Mill Power Feed is not simply a matter of buying the fastest motor. It is a decision about control, repeatability, torque, installation space, and everyday operator comfort. A compact feed should move the table smoothly, maintain a steady rate, and avoid sudden movement around delicate cutters. Small details matter. A loose bracket can ruin an otherwise useful upgrade.

Industry data supports this broader view. Grand View Research valued the global machine tools market at approximately $86 billion in 2023 and forecasts continued growth through 2030. AMT’s U.S. Manufacturing Technology Orders reports also show how strongly manufacturers continue investing in productivity-focused equipment. These reports cover complete machine tools, not Mini Mill Power Feed units specifically. That limitation deserves attention. Still, they reveal a clear direction: shops increasingly value repeatable processes, reduced setup time, and practical automation.

Machining educator John Saunders has expressed a useful principle: “Repeatability matters more than raw speed.” That idea fits mini mill upgrades well. A feed that crawls consistently may outperform a faster model with noticeable vibration. Look for adjustable speed, sufficient torque, reliable limit switches, and a rigid mounting system. Check the mill’s voltage and table travel before ordering. Compatibility is easy to underestimate.

The perfect choice does not exist.

A cautious buyer should compare real operating conditions, not only advertised specifications. Consider aluminum, steel, cutter diameter, table load, and available workspace. Some product pages make performance sound effortless. Actual results can be less impressive. A properly selected Mini Mill Power Feed should make routine cuts feel calmer, steadier, and easier to repeat.
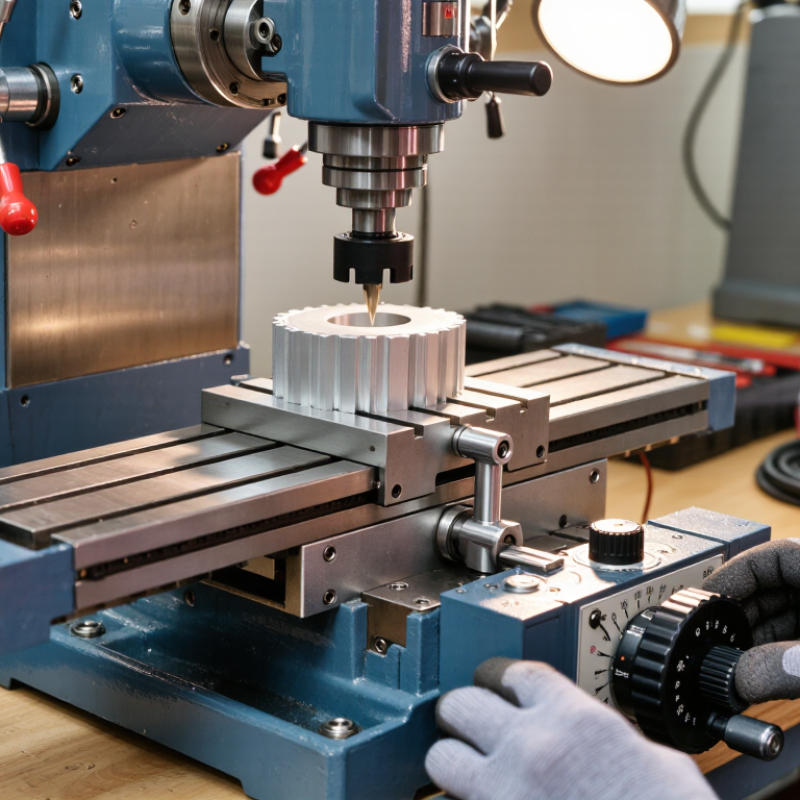
How to Choose a Mini Mill Power Feed?

Define Feed Requirements: 0–20 IPM Speed and 0.1–0.25 HP Motor Range

Choosing a mini mill power feed starts with realistic feed requirements, not the motor’s maximum rating. A useful working range is 0–20 inches per minute (IPM). Low speeds help during heavy cuts, small end mills, and interrupted surfaces. Higher speeds suit light aluminum passes, edge finishing, and long straight cuts. The feed should move smoothly without stalling, surging, or leaving visible waves on the workpiece.

Motor power usually falls between 0.1 and 0.25 horsepower for this machine size. A 0.1 HP motor can handle light cutting when the table is clean, lubricated, and properly adjusted. Choose closer to 0.25 HP when using wider cutters, harder materials, or longer machining cycles. More power is not automatically better. Excess power can hide poor setup habits and increase stress on gears, couplings, and table screws. Check the feed mechanism’s torque, speed control, mounting fit, and overload protection before installation.

I have found that a quiet, steady drive often produces better results than a faster unit with inconsistent motion. Still, published ratings can be optimistic, so test the feed with a shallow cut first. Watch the table movement, motor temperature, and cutter load. A practical choice leaves some capacity unused, rather than operating continuously at its limit.

Match Power to Travel: Compare 9–12 in. X-Axis Capacity and Torque

Choosing a mini mill power feed starts with X-axis travel, not motor size. A 9-inch unit suits compact workpieces and shorter table movements. A 12-inch unit offers more reach for fixtures, vises, and repeated cuts. Measure usable travel carefully. The advertised distance may exclude the space occupied by stops or mounting hardware.

Torque matters when cutting steel or taking deeper passes. A power feed with steady low-speed torque can maintain movement without sudden stalls. High top speed is less important for careful milling. Match the feed to your cutter diameter, material, and cutting depth. A heavier table also demands stronger drive performance, especially near the end of its travel. Check whether the feed can reverse smoothly and hold position without noticeable backlash.

Tips: Compare torque ratings at operating speed, not only peak motor power. Test the unit with your table fully loaded. Listen for pitch changes during a cut. If the motor slows sharply, reduce feed pressure or cutting depth. I once selected a feed by travel length alone, and the machine struggled under a steel setup. That mistake was avoidable. Also inspect the mounting space before ordering. A 12-inch travel system may fit the table but interfere with handwheels, stops, or coolant guards. Leave room for adjustment and maintenance. Small details matter.

Evaluate Electrical Specifications: 110/220 V Input and Continuous-Duty Rating

How to Choose a Mini Mill Power Feed?

A mini mill power feed should match your workshop’s electrical supply, not just the machine’s physical size. Check whether the unit accepts 110 V, 220 V, or both. A 110 V model suits many home workshops, while 220 V can reduce current demand on longer, heavier-duty circuits. Do not assume voltage compatibility. Confirm the input voltage, frequency, phase, fuse size, and plug requirements in the technical manual. One mistake here can damage the motor or create an unsafe installation.

Tips: Measure the outlet voltage with a properly rated meter, or ask a qualified electrician to verify it. Look for a continuous-duty rating rather than a short-term peak figure. The feed may run for hours during repeated passes, especially when cutting steel. Continuous-duty components should manage heat without frequent shutdowns. Keep the control box ventilated, and inspect cable insulation before installation. Small details matter.

During practical testing, listen for changing motor noise and feel for unusual heat around the housing. A warm case may be normal; excessive heat deserves attention. I have sometimes focused too much on feed speed and overlooked the circuit capacity. That was a poor habit. Also check whether the power feed includes overload protection and a clear emergency stop. These features support reliable operation, but they cannot correct an incorrectly wired supply. Choose a unit whose electrical specifications fit both your mill and your actual workshop conditions.

Verify Compatibility: Leadscrew Pitch, Mounting Pattern, and Limit Switches

How to Choose a Mini Mill Power Feed?

A power feed must match the mini mill’s leadscrew, not merely its table size. Measure the leadscrew pitch with a thread gauge or by counting turns over a known distance. A one-millimeter pitch and a 1.5-millimeter pitch need different drive gearing. They are not interchangeable. Check the screw’s diameter, thread form, and usable shaft length. Leave enough clearance for nuts, collars, and handwheel removal.

Mounting matters just as much. Record the hole spacing, bolt diameter, bracket thickness, and shaft center height. A small offset can create binding and uneven thrust. ISO 230-1 and ISO 230-2 emphasize alignment, geometric accuracy, and repeatability during machine-tool evaluation. Those principles also apply to aftermarket power feeds. Keep the bracket square. Test by hand first.

Limit switches deserve equal attention. Their trip points must stop travel before the table, saddle, or gib reaches a hard obstruction. AMT’s 2023 U.S. Manufacturing Technology Orders report recorded 24,713 machine units, showing how varied modern machine configurations can be. Compatibility tables are useful, but measurements remain stronger evidence. I once trusted a “universal” fit and overlooked switch clearance. It worked, but poorly. A safer inspection uses slow jogging, a dial indicator, and repeated tests at both travel ends. Five minutes here can prevent expensive damage.

How to Choose a Mini Mill Power Feed

For a single-start leadscrew, travel per motor revolution equals the screw pitch. A 10 TPI screw advances 2.54 mm per revolution, while a 20 TPI screw advances 1.27 mm. Metric screws advance by their stated millimeter pitch.

Before installation, verify the leadscrew pitch, the power-feed mounting-hole pattern and clearances, and the position and operating direction of both limit switches. These mounting and switch dimensions are not standardized, so they must be measured against the machine and power-feed assembly.

Prioritize Safety Features: Overload Protection, Soft Start, and Replaceable Gears

Choosing a mini mill power feed starts with safety, not speed. A useful unit should include overload protection that stops the drive when the cutter binds or the table meets excessive resistance. This feature protects the motor, gears, and operator from sudden movement. Check whether the protection resets manually or automatically. Manual reset is often safer because it encourages inspection before restarting.

Soft start is equally important. A gradual increase in torque reduces shock across the lead screw and transmission. It also helps prevent the cutter from grabbing the workpiece during startup. In a small workshop, this smoother acceleration feels easier to control, especially when working with aluminum or thin stock. Listen for unusual vibration. That matters.

Replaceable gears deserve close attention. Gears eventually wear, even when lubrication and alignment are good. A replaceable gear system can extend the power feed’s service life and reduce repair costs. Inspect the gear material, tooth profile, and access to replacement parts before buying. If the housing must be completely removed for a simple gear change, maintenance may become frustrating.

I once underestimated how much backlash affected automatic travel. The feed worked, but reversing direction caused a noticeable pause. That experience changed my checklist: test forward and reverse motion, examine the emergency stop, and confirm the guards remain secure. Specifications can look convincing, yet hands-on checks reveal weaknesses. Leave room for that doubt. A reliable power feed should feel predictable, adjustable, and easy to inspect.

How to Choose a Mini Mill Power Feed? Prioritize Safety Features: Overload Protection, Soft Start, and Replaceable Gears
Safety Feature Why It Matters What to Look For Practical Verification Priority
Overload Protection Helps stop or limit the drive when cutting resistance becomes excessive, reducing the risk of stalled motors, damaged gears, and unexpected workpiece movement. Electronic current limiting, an overload trip, or a clearly specified mechanical torque-limiting system. Confirm the protection method in the instruction manual. Check whether the system resets automatically or requires a manual reset after an overload. Essential
Soft Start Gradually increases motor power instead of applying full torque instantly. This reduces starting shock on the gearbox, leadscrew, couplings, and workholding setup. A controlled acceleration period and a start control that prevents an abrupt full-speed launch. With the machine unloaded and secured, observe whether the feed starts smoothly without a sudden lurch or harsh gear noise. Essential
Replaceable Gears Gears are wear components that can be damaged by excessive load, poor lubrication, or a crash. Replaceable parts can reduce repair time and downtime. Individually replaceable gears, documented part numbers, accessible service covers, and gear material information. Verify that replacement gears are available and that the manual explains inspection, lubrication, and replacement procedures. High
Emergency Stop Control Provides a fast way to remove power during entanglement, tool breakage, unexpected motion, or other hazardous conditions. A prominent, easy-to-reach emergency-stop button that latches when pressed and requires a deliberate reset. Check that pressing the control stops powered motion and that resetting it does not restart the feed automatically. Essential
Direction Interlock Prevents accidental or abrupt direction changes while the feed motor is running, which can overload the transmission and workholding system. A control design that requires the motor to stop before changing from forward to reverse. Review the operating instructions and confirm that the direction selector cannot be changed safely during powered motion. High
Adjustable Feed Rate Allows the operator to match table movement to cutter diameter, material, depth of cut, and machine rigidity. Excessive feed can increase cutting forces and overload risk. A clearly marked speed control with a low enough minimum setting for small cutters and light finishing passes. Check the stated feed-rate range and verify that the control changes speed progressively rather than in unpredictable jumps. High
Limit Switches or Travel Stops Helps prevent the table from reaching the end of its travel, reducing the chance of leadscrew, nut, gearbox, or workpiece damage. Reliable end-of-travel switches, adjustable stops, or a clearly defined manual stop procedure. Confirm that the switch or stop interrupts powered motion before mechanical end-of-travel contact occurs. High
Manual Override Capability Allows the operator to regain control if electrical power is lost or the power-feed unit is not suitable for a particular operation. A usable handwheel or disengagement mechanism that does not require excessive force. With power isolated, verify that the table can be moved manually and that the override mechanism engages securely. High
Enclosed Transmission Reduces exposure to moving gears and helps retain lubricant, limiting contact hazards and contamination from chips. A rigid gear cover with secure fasteners and openings that do not expose rotating components during normal operation. Inspect the cover for gaps, loose hardware, sharp edges, and convenient access for cleaning and lubrication. High
Electrical Protection Protects the motor and control circuit from faults, overheating, and unsuitable power conditions. Correctly rated fuse or circuit breaker, grounding provisions, strain relief, and an enclosure suitable for the workshop environment. Compare voltage and current requirements with the available supply. Inspect the power cord, grounding conductor, and enclosure before installation. Essential
Low-Backlash Coupling Excessive backlash can cause inconsistent table movement and may produce impact loads when the feed direction changes. A secure coupling with appropriate alignment and a documented adjustment or replacement procedure. Check for looseness, unusual clicking, or delayed table response when reversing direction with the machine stopped. Medium
Serviceability and Spare Parts Safety depends on maintaining protective devices, gears, switches, and wiring in working condition throughout the equipment’s service life. Clear maintenance intervals, exploded diagrams, replacement components, and accessible lubrication points. Before purchase, confirm that manuals and service parts can be obtained without modifying safety-critical components. High