
1-208-754-4884

How to Choose the Right Shredder Parts for Your Machine

Choosing the right Shredder Parts is not a catalog exercise. It is a decision about how your machine cuts, handles material, and withstands daily stress. A rotor turning through mixed feedstock needs parts matched to its design, not simply the closest-looking replacement. Check the machine model, rotor dimensions, cutting geometry, material type, and operating conditions before ordering. A few millimeters can matter. So can the hardness of a knife or screen. When those details are overlooked, wear may become uneven, output may fall, and maintenance intervals can shorten.

Maintenance and reliability expert John Moubray described reliability-centered maintenance as “a process used to determine what must be done to ensure that any physical asset continues to do whatever its users want.” That principle applies here: choose parts around the machine’s actual job, not a generic promise of longer life. Ask suppliers for dimensional specifications, material details, compatibility guidance, and clear documentation. Compare expected wear with your records, including throughput and downtime. A shiny new component is not automatically the right one. The uncomfortable part? Operators sometimes lack complete wear data, and assumptions fill the gap. Keep notes, inspect contact surfaces, and review performance after installation. This guide outlines the checks that help you choose confidently, while recognizing that every shredder and operating site has its own limits.
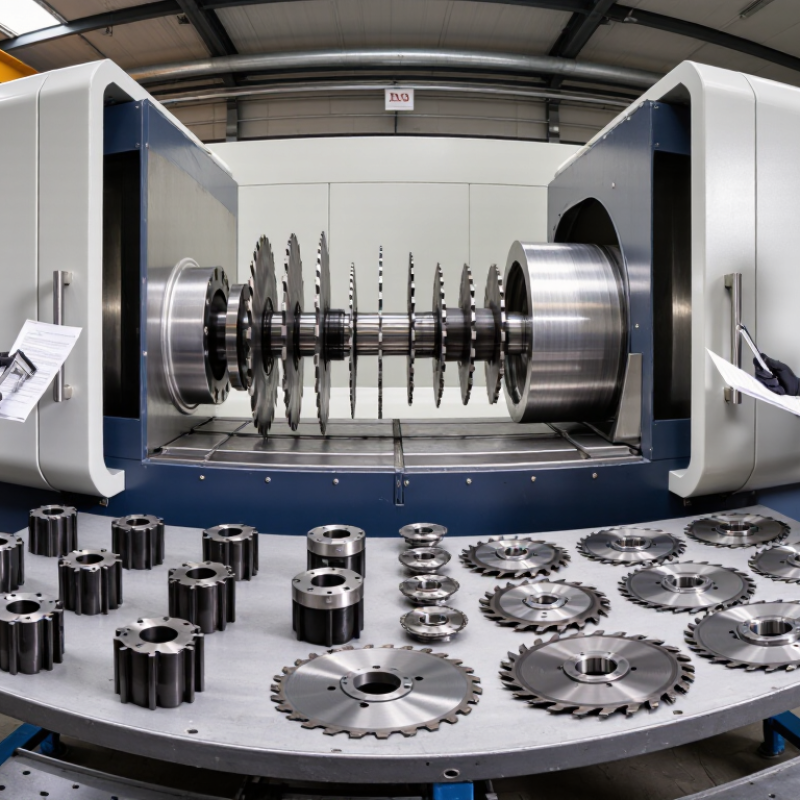
How to Choose the Right Shredder Parts for Your Machine

Identify Your Shredder Type, Model, and Operating Requirements

Choosing shredder parts starts with identifying the machine correctly. Record its type, such as single-shaft, twin-shaft, or granulator, then check the model and serial number on the nameplate. Confirm rotor dimensions, cutter thickness, mounting pattern, and screen aperture against the machine manual. A similar-looking part may still have different clearances. Easy to miss.

Next, describe what the machine actually processes and how it runs. Note the material, feed size, contamination, daily hours, and any heat or vibration issues. These details affect wear and help distinguish a standard replacement from a part suited to demanding duty. A worn component can also distort measurements, so compare it with a drawing or an undamaged sample where possible. The U.S. Department of Energy’s 2010 Operations & Maintenance Best Practices guide estimates predictive maintenance can save 8–12% over preventive maintenance and 30–40% over reactive maintenance. That figure is not a shredder-parts guarantee, but it supports tracking condition and maintenance history. Before ordering, verify dimensions, material specification, and fit with a qualified technician. A photo alone is weak evidence.

Understand the Function of Each Shredder Part

A shredder works as a system, so each part should match the material and machine. The rotor carries cutting tools and creates the shear that breaks incoming stock. Hook or knife shape affects how material is grabbed, pulled, and reduced. Choose tooling for the feedstock, not just its appearance. A tough-looking blade can still wear quickly on abrasive input.

Counter knives, or anvils, provide opposing edges. Correct clearance supports clean cutting and limits excess load. Screens control output size: smaller openings usually produce finer pieces, but may slow throughput and raise heat. Bearings support the rotating shaft, while seals help keep dust and debris away from rolling surfaces. That matters. Match bearing dimensions, load rating, lubrication needs, and operating speed to the machine.

Drive components transfer motor power to the rotor. Belts, gears, and couplings handle alignment and shock differently, so confirm fit and torque requirements before replacing one. Feed rollers regulate material entry; worn teeth can cause uneven feeding or slipping. Small details matter. Inspect the old part for scoring, cracks, unusual heat marks, and uneven wear. These clues may reveal a mismatch elsewhere, not simply a bad component. I would still verify measurements against the machine manual; a part that nearly fits is not a safe fit.

Match Part Materials and Designs to Your Shredding Needs

Match each shredder part to the material it will actually face. Clean cardboard needs sharp cutters and a screen that prevents long strips from passing through. Mixed wood or feed containing grit calls for tougher wear surfaces and a design that tolerates impact. Hardness alone is not enough. A very hard edge may chip when the feed contains knots or metal fragments, while a tougher edge may need more frequent sharpening.

Feed composition matters. The U.S. Environmental Protection Agency’s 2018 Advancing Sustainable Materials Management report recorded 292.4 million tons of municipal solid waste generated in the United States, with 69 million tons recycled. Those figures describe a broad waste stream, not a shredder’s workload, but they show why one part specification cannot suit every material mix. Check cutter geometry, screen opening, rotor speed, and required output size together. Small details count. A narrow screen can improve size control but may raise heat and wear when material is damp. Record what fails, too. That record is imperfect, yet it can reveal whether the problem is abrasive feed, poor clearance, or simply a part that does not match the job.

Verify Dimensions, Compatibility, and Manufacturer Specifications

Choosing shredder parts by appearance alone can lead to poor fit, excess vibration, or uneven cutting. Measure the existing part and compare it with the machine drawing or service manual. Check overall length, width, thickness, mounting-hole diameter, and hole spacing. Small differences matter. A hole that is slightly off-center may prevent secure installation.

Compatibility also depends on how the part meets the rotor and neighboring components. Confirm tooth profile, rotation direction, clearance, and the position of spacers or shims. If a dimension is difficult to measure, record it with calipers and take a clear photo beside a ruler. That is useful, but it should not replace a specification check. I have seen measurements copied from worn parts, which can preserve an old error.

Verify the machine’s exact model and serial range against the manufacturer’s parts list, then check material grade, hardness, and any stated tolerances. Do not assume parts from machines with similar names are interchangeable. If the documentation conflicts with the physical measurement, pause and ask the manufacturer or a qualified technician to confirm the correct revision. It can feel slow. It is usually cheaper than forcing a part into place or discovering misalignment after startup.

Evaluate Part Quality, Service Life, and Maintenance Needs

A shredder part should match the material being processed, the machine’s speed, and the force applied during each cycle. Compare the part’s alloy, heat treatment, and working dimensions with the machine manual or a qualified technician’s guidance. A hard surface can resist abrasion, but excessive brittleness may lead to chipping under impact. Look closely at edges, mounting holes, and welds for clean finishing and visible defects. Check the fit.

Service life depends on more than the part’s advertised hardness. Track operating hours, throughput, and the type of material processed, then compare wear across inspections. Uneven wear can point to misalignment, loose fasteners, or an unsuitable part profile. That matters. A simple log with dates, measurements, and photos helps identify patterns before performance drops. No estimate predicts every working condition, so treat service-life figures as guides, not guarantees.

Maintenance needs should influence the choice from the start. Parts that are easy to inspect, remove, and replace can reduce downtime, even if their purchase price is higher. Check whether the machine requires special tools, precise clearances, or scheduled rotation. Keep replacement fasteners and inspection tools accessible, and follow the machine’s shutdown procedures before checking components. It is tempting to stretch a part’s use until output changes, but that can make wear harder to assess. A slightly irregular inspection schedule is better than no record at all.

How to Choose the Right Shredder Parts for Your Machine - Evaluate Part Quality, Service Life, and Maintenance Needs

Part Quality factors to evaluate Typical service-life planning range* Maintenance needs Replacement warning signs
Cutting knives or cutters Wear-resistant, application-appropriate steel; consistent hardness; accurate dimensions; secure mounting and suitable cutting geometry. About 500–2,000 operating hours, depending heavily on feedstock, contamination, and cutting conditions. Inspect edges and fasteners regularly; rotate or reverse reversible cutters as designed; maintain correct clearances and torque. Rounded or chipped edges, rising power draw, reduced throughput, uneven product size, or abnormal vibration.
Screen or sizing grate Wear-resistant material; correctly sized openings; sound welds or construction; fit compatible with the machine and target output. Often 1,000–4,000 operating hours; abrasive or contaminated material can shorten life substantially. Check for blocked openings, cracks, deformation, and uneven wear; clean safely and inspect during planned shutdowns. Enlarged or distorted openings, cracks, loose sections, inconsistent particle size, or frequent clogging.
Rotor or shaft Correct material and heat treatment; dimensional accuracy; sound welds where applicable; verified balance and compatibility with the rotor assembly. Typically a multi-year component; actual life depends on loading, impact events, alignment, and inspection results. Monitor vibration and temperature; inspect for cracks, runout, and wear; verify alignment after major service. Persistent vibration, visible cracking, measurable runout, repeated bearing failures, or unusual noise.
Bearings and seals Correct load rating, fit, clearance, sealing arrangement, and lubricant compatibility for the machine operating conditions. Service life varies widely; properly selected, aligned, lubricated bearings may operate for tens of thousands of hours, but contamination and shock loads reduce life. Follow the specified lubrication type and schedule; keep seals clean; monitor temperature, noise, and vibration. Excess heat, grease leakage or contamination, rough rotation, unusual noise, or increasing vibration.
Drive belts or couplings Correct size and torque capacity; material suitable for the environment; accurate alignment and secure connections. Highly dependent on load, alignment, starts, and operating environment; use inspection findings rather than a fixed replacement interval. Check belt tension and alignment; inspect coupling elements and fasteners; keep oil and debris away from belt surfaces. Cracks, fraying, glazing, slipping, damaged coupling elements, or recurring alignment issues.
Gearbox components Correct gear ratio and load rating; accurate tooth geometry; compatible materials and heat treatment; suitable lubricant specification. Often designed for long-term service, but life depends on load, lubrication, temperature, alignment, and shock loading. Check oil level and condition; follow specified oil-change intervals; monitor temperature, leakage, and operating noise. Metal particles in oil, rising temperature, persistent whining or knocking, leakage, or abnormal backlash.

*Service-life figures are indicative planning ranges, not guarantees. Actual life varies with machine design, material processed, contamination, operating hours, installation, and maintenance. Always follow the machine manual and inspect parts under safe lockout procedures.